The Best Beauty Blenders and Makeup Sponges, and How to Keep Them Spotless
How to clean makeup brushes and beauty blenders like a pro — a London MUA's hygiene routine, plus the best sponges, cleansers and drying racks.

When a client tells me their foundation always looks patchy, cakey or a little grey by lunchtime, my first question is almost never about the foundation. It is about the sponge. Nine times out of ten, the product is perfectly good — it is the tool putting it on that is letting them down. A sponge that has not been washed in a fortnight is holding old foundation, skin oil and, frankly, a colony of bacteria, and every one of those things ends up smeared across a freshly cleansed face.
After years of doing makeup on real people in real London bathrooms and hotel rooms, I have come to think of tool hygiene as the least glamorous and most important part of the whole craft. It is the difference between a base that sits like skin and one that clings to every dry patch. So let me walk you through exactly how I keep my kit spotless, how often you actually need to bother at home, and the sponges, cleansers and bits of kit I would genuinely put in your hands.
Some links below are affiliate links. As an Amazon Associate I earn from qualifying purchases — at no cost to you. I only recommend products I would genuinely use on a client.
Why dirty tools are the number-one reason home makeup goes patchy
Think about what a sponge or brush does. It picks up product, drags it across your skin, and picks up whatever your skin is giving off — sebum, sweat, dead skin, yesterday’s SPF. All of that soaks into the sponge or settles into the base of the bristles. The next time you use it, you are not applying clean foundation to clean skin; you are applying a slurry of old product mixed with new, through a filter of grease.
That is why the finish goes patchy. Old product in the sponge grabs unevenly, dry areas exaggerate, and the whole thing looks heavier than it should. There is a skin-health side too — a damp, dirty sponge is a genuinely lovely home for bacteria, and pressing that into your pores is one of the quieter causes of those small, stubborn breakouts along the jaw and cheeks. Clean tools are not fussiness. They are the single easiest upgrade to how your makeup looks and how your skin behaves.
How often you actually need to clean your brushes and sponges
I will be honest about the professional standard and then the realistic home one, because they are not the same.
In my kit, anything that touches a client’s face is cleaned and disinfected between every single person. That is non-negotiable for hygiene. At home, you are only touching your own face, so you have more latitude — but sponges and brushes are different animals.
A damp sponge is the priority. Because it lives wet, it should be washed after every use, or at the very least every couple of wears. That sounds like a lot, but a proper wash takes ninety seconds. Brushes that touch liquid or cream products — foundation, concealer, cream blush — want a wash roughly once a week. Brushes you use with powders — setting powder, bronzer, eyeshadow — are far more forgiving and can go a couple of weeks between deep cleans, with a quick spot-clean in between if you are switching between dark and light shades.
How to clean makeup brushes: my step-by-step routine
Here is the exact deep-clean method I use, and it works on both natural and synthetic bristles.
- Wet only the bristles under lukewarm water, pointing them downwards. Keep water away from the ferrule — that is the metal collar where the bristles meet the handle. Water that gets up there loosens the glue over time, and that is how brushes start shedding.
- Work a little cleanser into the bristles, either in your palm or on a textured washing mat. Swirl gently in circles; don’t crush or splay them.
- Rinse, still bristles-down, until the water runs completely clear. Cloudy water means there is still product hiding in the core.
- Squeeze out the excess gently with a clean towel and reshape the bristles back to their original point or edge with your fingers.
- Lay flat to dry, ideally with the bristles hanging slightly over the edge of a surface, or on a rack, so air circulates and water drains away from the ferrule.
If you want a fuller primer on which brush does what before you start washing them, I wrote a whole guide to choosing and using makeup brushes that pairs neatly with this one.
Deep clean vs. quick spot clean between looks
A deep clean is the full wash above. A spot clean is what you do mid-look when you want to switch a brush from a dark shade to a light one without starting over — a spritz of a fast-drying brush cleaner onto a tissue, then wipe the brush back and forth until it comes off clean. Spot cleaning is a convenience for switching shades; it is not a substitute for a proper wash. The core still needs a real wash on schedule.
Drying and storing them so they keep their shape
Never, ever dry brushes standing upright in a pot while wet. Gravity pulls the water straight down into the ferrule, and over a few months that is exactly what ruins a good brush. Dry them flat or bristles-down, reshape while damp, and only stand them up in a pot once they are bone dry. Store them somewhere they are not squashed against each other, so the shapes stay true.
How to clean a beauty blender without wrecking it
Sponges take a slightly different approach because you are cleaning the whole thing, not just protecting a ferrule.
Wet the sponge fully so it swells to its full size — a dry sponge tears far more easily and drinks up too much product anyway. Work a cleanser gently into the surface and, importantly, into the core, then squeeze under running water. You will see a startling amount of foundation come out of what looked like a clean sponge; keep going until the water runs clear. Never scrub aggressively or wring it like a dishcloth, as that breaks down the foam and shortens its life. Squeeze — don’t twist. Then set it somewhere open and airy to dry completely; a sponge that lives permanently damp in a closed drawer is asking for mould.
The sponge test: when to bin it and start again
Even a beautifully cared-for sponge is a consumable, not a keepsake. It is time to replace it when it tears, when it stays stained no matter how you wash it, when it loses its bounce and feels hard or crumbly, or when it develops any dark spotting — which can be mould and should go in the bin immediately. As a rough rule, a well-loved sponge lasts around three months. This is exactly why I am relaxed about using more affordable multipacks day to day, which I will come to.
The best beauty blenders and makeup sponges to own
The original that started it all
There is a reason the original is still in my kit after all these years. The density and the particular bounce of it give the most seamless, skin-like foundation finish of anything I have used — it presses product into the skin rather than dragging it across, which is the whole secret to a base that looks like you, only rested. If you buy one considered sponge for special occasions and want the genuinely best finish, this is it.

BeautyBlender Original Make up Ei Latexfrei Schwämmchen make
£15.74 Amazon price, checked Jul 2026
The original for a reason — the bounce and density give the most seamless, skin-like foundation finish, which is why it's still in every kit.
View on Amazon →The affordable multipack I actually prefer for foundation
And here is my honest everyday confession. For day-to-day foundation, I very often reach for this three-pack instead. You get three sponges for the price of a single designer one, the flat edge is genuinely brilliant for getting into the sides of the nose and under the eyes, and — crucially — the low price means I can bin and replace them the moment they are past their best, guilt-free. That is better hygiene than clinging to one precious sponge for too long. For most people at home, this is the smarter buy.
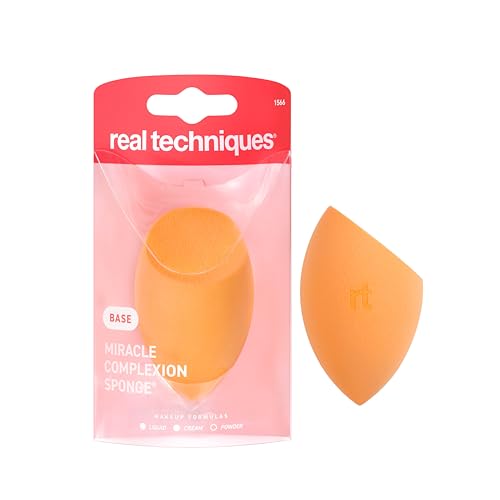
Real Techniques Miracle Complexion Sponge for Liquid & Cream
£6.94 Amazon price, checked Jul 2026
My honest everyday pick: three sponges for the price of one designer one, with a flat edge that's brilliant around the nose — so you can bin and replace them guilt-free.
View on Amazon →The cleansers worth buying
Washing-up liquid and hand soap will technically clean a brush, but they are harsh, they strip natural bristles, and they leave a residue that can irritate skin. A purpose-made cleanser is worth the small outlay.
Liquid and shampoo cleansers for a proper deep clean
For sponges specifically, a liquid cleanser made for the job lifts oil and pigment out of the core in a way water simply cannot — and the core is exactly where bacteria breed. This is the one I use for a proper wash of my blenders.
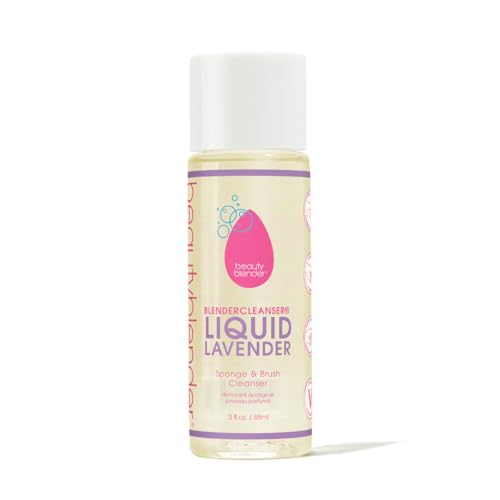
BeautyBlender blendercleanser Liquid
£13.11 Amazon price, checked Jul 2026
A liquid cleanser formulated for sponges lifts oil and pigment out of the core, where water alone leaves a breeding ground for bacteria.
View on Amazon →For a monthly deep clean of a full set of brushes, a gentle liquid shampoo is my choice. It cleans both natural and synthetic bristles thoroughly without stripping them or leaving them splayed and frizzy, which harsher soaps will do over time. A little goes a long way, so one bottle lasts an age.

EcoTools Makeup Brush and Sponge Shampoo
£9.29 Amazon price, checked Jul 2026
A gentle liquid shampoo for a proper monthly deep clean of natural and synthetic bristles without stripping or splaying them.
View on Amazon →Solid cleansers and bars for a quick everyday wash
If the faff is what stops you cleaning your brushes, a water-activated solid bar removes the excuse. You wet the brush, swirl it on the bar, rinse, and you are done — no measuring, no decanting. It is the fuss-free way to keep brushes clean on a weekly rhythm, and a single bar lasts for months of regular use.

e.l.f. Clean Queen Solid Brush & Sponge Cleaner
£7.27 Amazon price, checked Jul 2026
A water-activated solid bar is the fuss-free way to keep brushes clean weekly — swirl, rinse, done — and it lasts for months.
View on Amazon →Drying racks and the small kit that keeps things hygienic
The single most damaging thing people do to good brushes is dry them the wrong way up. A dedicated rack solves it — brushes hang bristles-down and flat so water drains away from the ferrule instead of rotting the glue, and the textured mat that comes with it doubles as a washing surface. It is a small, cheap thing that meaningfully extends the life of everything else you own.

QUMENEY 28 Hole Makeup Brush Drying Rack & Cleaning Mat
£7.88 limited stock Amazon price, checked Jul 2026
Brushes must dry bristles-down and flat so water doesn't rot the glue in the ferrule — this rack does both jobs and doubles as a textured wash mat.
View on Amazon →How to use a beauty blender the right way
Since we are here, the two rules that fix most sponge problems. First, always use it damp — wet it, then squeeze out the excess water in a towel until it is springy but not dripping. A damp sponge sheers foundation out for a natural, skin-like finish; a dry one soaks up product and drags it on thick. Second, bounce, don’t wipe. Press and roll the sponge into the skin in little dabbing motions rather than swiping it around. Bouncing builds an even, imperceptible layer; swiping just moves product from one place to another and leaves streaks. Master those two things and your base will change overnight. If you would like more of this kind of hands-on detail, my guide to everyday makeup techniques goes further.
Frequently asked questions
Can I clean my makeup brushes with washing-up liquid?
You can, and it will remove product, but I would not make a habit of it. Washing-up liquid is formulated to cut grease aggressively, which strips the natural oils from animal-hair bristles and can dry out synthetic ones, leaving them stiff and frizzy over time. It can also leave a residue that irritates sensitive skin. A gentle purpose-made cleanser or even a mild baby shampoo is far kinder to both your brushes and your face.
How do I know when to throw away my beauty blender?
Bin it when it tears, crumbles, loses its bounce, stays stained after washing, or develops any dark spots that could be mould. Even with perfect care, a sponge is a consumable and around three months is a sensible lifespan. When in doubt, replace it — sponges are inexpensive, and a sponge you are unsure about is not worth pressing into your skin.
Why does my foundation look patchy even with a clean sponge?
If the tool is genuinely clean, the usual culprit is a dry sponge or dry skin underneath. Make sure the sponge is properly damp and bounce rather than wipe. If patchiness clings to particular areas, those spots likely need better skin prep — a touch more moisturiser and time to sink in before foundation. My makeup products guide covers the base and prep side in more detail.
How often should I really wash my brushes if I wear makeup every day?
For daily wearers, foundation and concealer brushes want a wash about once a week, powder brushes every couple of weeks, and any damp sponge after each use or every couple of wears at most. If that feels like a lot, a solid cleaning bar makes the weekly wash a ninety-second job rather than a chore.
Is it worth buying an expensive beauty blender over a cheaper one?
The pricier original does give a marginally more seamless finish, and for a wedding or special event I would reach for it. But for everyday use, an affordable multipack is the smarter choice for most people — you get the same fundamental job done, and the low cost means you actually replace them on schedule, which matters far more to your skin than the brand on the packet.
Getting your tools clean is genuinely half the battle, and it is one of the first things I look at when someone books a one-to-one session with me. If your base never quite behaves and you would like a fresh pair of eyes on your whole routine — tools, prep, products and technique — a personal makeup lesson is the fastest way to fix it, because we work with your own kit and your own face rather than a generic list. I will happily tell you which of your brushes to keep, which to retire, and exactly how to look after the rest.
Prices and availability were correct when I checked in July 2026 and change often — the live price is always on Amazon. Certain content on this page comes from Amazon and is provided "as is". As an Amazon Associate I earn from qualifying purchases.